Using the Tasks page
In brief
The Tasks page is where you can manage tasks within a project. There are two views available as tabs: 'List view', which allows you to click individual tasks and view them in detail; and Table view', which provides a tabularised view of all tasks available to you. Both views have extensive filtering capabilities to help you narrow down the tasks you wish to see.
Required permissions
Can view their own tasks
List view#
To begin with, please navigate to Tasks. Once there, by default, you should have the 'List view' tab selected with the filter of 'My open tasks'.
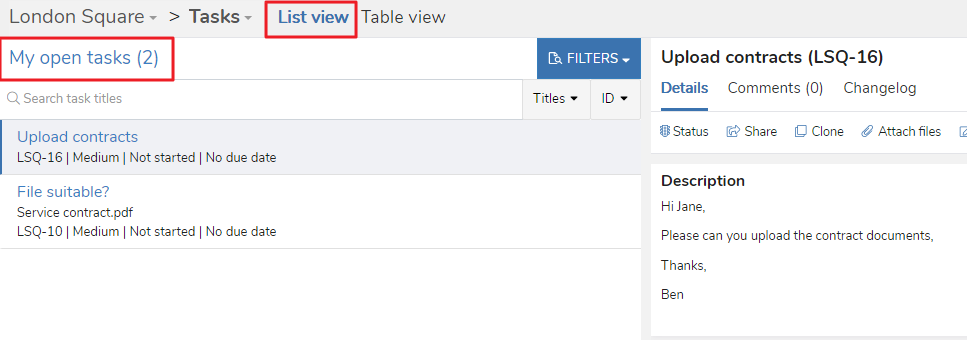
As you can see, the 'List view' provides a list of tasks on the left hand side. In the above example, 'Upload contracts' and 'File suitable?' are the two available tasks. Upload contracts has been selected, hence the blue left hand side border and background shading. You'll notice that there is brief information concerning the task in the list view entry - the task shortcode (which consists of the project shortcode + the task ID), priority, status and dude date. If there are any uploaded files, these will also appear, as shown in the 'File suitable?' task.
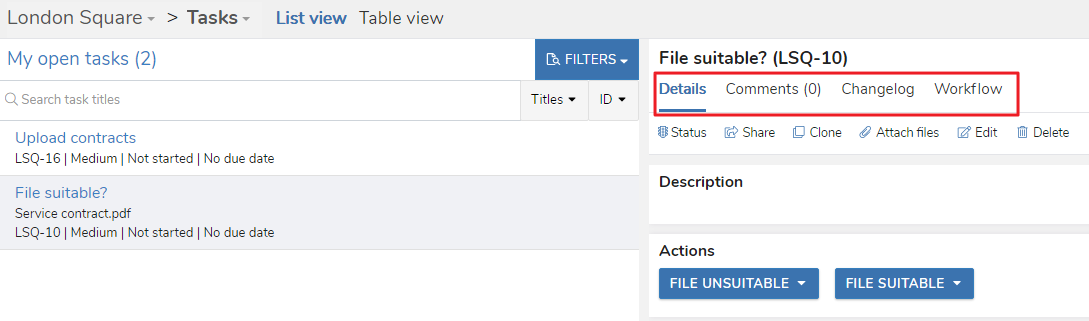
When you then click a task, that populates the right hand side with that task's details. Any information or actions to do with the selected task can be viewed there. Tabs are used to segregate and organise the task's information - they are available beneath the selected task's name on the right hand side. We'll discuss each tab in more depth below.
Lastly, if you have a large number of tasks, you may need to use the task page navigation. You can do this by clicking the left or right chevron buttons at the bottom right of the task list.

Good to know
You can resize or completely hide the task list. See here for more information.
Using filters#
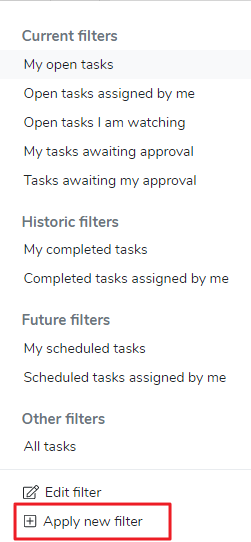
In the above example, you can see that we have two 'open' tasks - by open we mean that there are two tasks on the project that are assigned us and have the status of 'not started', 'in progress', 'paused' or 'awaiting approval'. By clicking the blue 'Filters' button, you can change what tasks are displayed to you. To help, there are a number of default filters you can choose from:
- Current filters - so things that are happening at the moment - tasks that are open, require your approval etc.
- Historic filters - tasks completed in the past
- Future filters - tasks that have been scheduled for assignment at a later date
Please note, the actual list of filters available to you will depend on your permissions.
If you click any of these default filters, you'll notice that the tasks in the left hand side update to reflect your new filter.
If you wish to create your own filter, you can click 'Apply new filter' at the bottom of the filters menu, or 'Edit filter' if you wish to edit an existing filter.
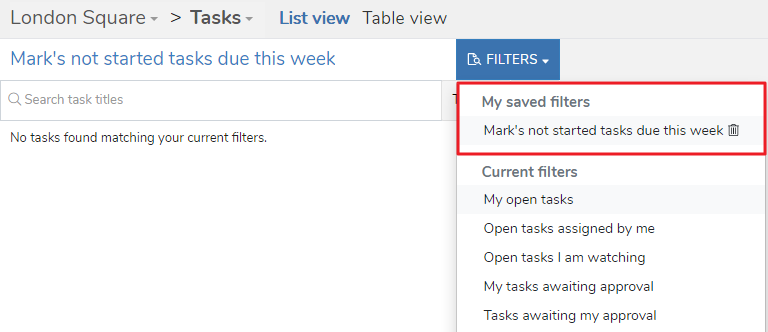
In the new window that opens there are a variety of filters (dependent on your permissions) you can apply to narrow down what tasks you see. As an example, the below filter will show us any tasks that have the status of 'not started', are due within a week and are assigned to the user 'Mark Phillips'.

As you can see, complex filters can be quickly and easily created. If you then hit 'Apply', this will then update your task list with the relevant tasks. Optionally, you can also check the 'Save as new filter' checkbox to save this filter. You'll then be prompted to give the filter a name, and it will appear in your filter list from then on under 'My saved filters'.
Good to know
Provided it's a saved or default filter, Exaprojects will save your current filter when you leave the Tasks page and then restore it by default when you visit again.
Searching and ordering#
If you need further filtering after applying your filter, searching and ordering provides a secondary means in which to narrow down your results. Typing into the search box that's located beneath the current filter name and above the list of tasks will search your results as you type.
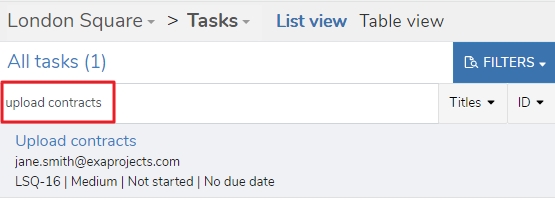
Furthermore, by clicking the dropdowns to the right of the search box ('Titles' and 'ID' in the above image) , you have the option to search by task:
- Title
- Description
- ID
As well as order the results by:
- ID
- Title
- Priority
- Due date
- Created date
You can then decide to order by descending (biggest/most recent first) or ascending (smallest/oldest) first.
As an example, in the below video we'll change to searching task descriptions and order by created date.
Task tabs#
Details#
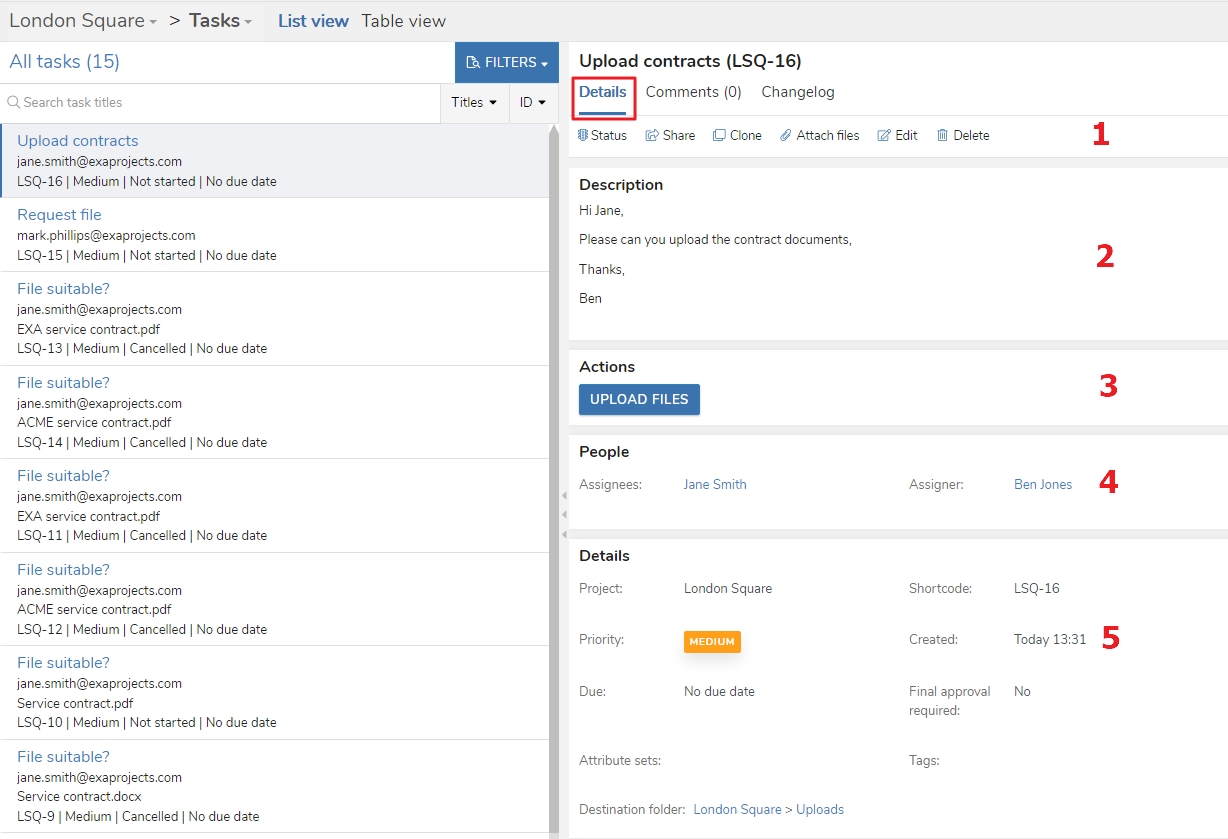
When you select a task in the 'List view', the 'Details' tab is shown by default. To help describe the various parts of this tab, we've labelled the screenshot below.
Action bar, which contains a variety of useful buttons for managing the current task (dependent on your permissions). These are:
'Status' - change the task status (from 'not started' to 'in progress', for example).
'Share' - share a link to the task with another user.
'Clone' - opens the Create New Task window, with the details of current task prepopulated, allowing for the task to quickly recreated.
'Attach files' - allows files to be attached to the task. This can be useful as an assigner to attach supporting information to your task for the assignees to see, for example.
Please be aware that from the perspective of the task assignee, attaching files to a task is different to uploading files as part of an Upload task. Attaching files to an Upload task will not complete the task - only files uploaded via the 'Upload files' button will.
'Edit' - edit details about the current task (such as its description, due date, etc.).
'Delete' - delete the task (ensuring it is removed from the system and no longer needs to be completed by anyone).
'Description' - this is optional information provided by the assigner of the task to assist in completing the task.
'Actions' - this panel contains the various actions available to you to complete your task. This is dependent on the task type. In the above example, the task type is an Upload task, so the available action concerns uploading (see completing an Upload task). A Decision task, on the other hand, would list the available decisions you can make as part of the task (see completing a Decision task).
'People' - this panel informs you who the assignees of the task are as well as who the assigner is. Note that you can click the users' names there and quick contact them.
'Details' - lastly, this section provides extra information about the task, such as its priority, due date, task shortcode, created date, etc. As the above example is an Upload task, and we have the relevant permissions, we can also see the folder in which any uploaded files will be uploaded to.
Dependent on the task type and its status, you may also see a 'Completed info' panel, which contains relevant information provided by the assignee in order to complete their task. This could be a table of uploaded files for an Upload task, or their chosen decision for a Decision task. Additionally, for a workflow task, you may see a 'Workflow files' table, which lists any files uploaded as part of the workflow.
Comments#
This tab lists any comments that have been made on the task or, if applicable, as part of the workflow. Please see this help file for more information about task commenting.
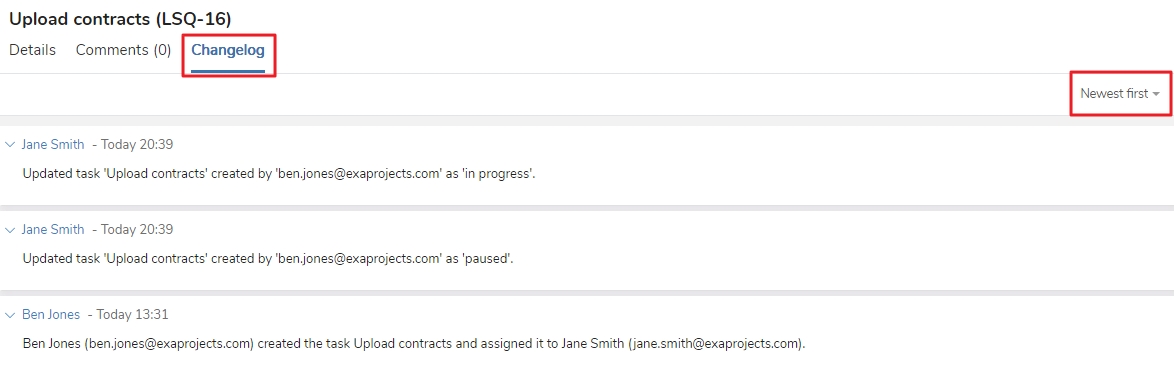
Changelog#
The changelog provides you with a history of what's happened to a task. In the below example, we can see Ben Jones created the task and assigned it to Jane Smith, who later changed its status to 'paused' and then to 'in progress'. Also note you can change the order of the changelog by clicking 'Newest first'.
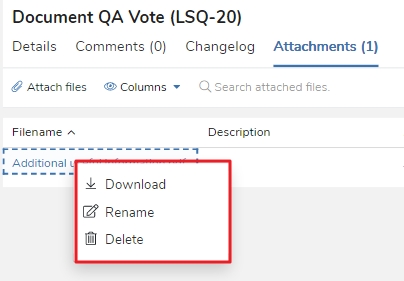
Attachments#
If there are files attached to a task, the 'Attachments' tab will be present. This contains a table of any attached files.

By clicking the attached filename in the 'Filename' column, you can view the available actions for that attachment. For example, downloading, renaming or deleting it.
You can also attach files by clicking the 'Attach files' button in the action bar above the table. As noted above, please be aware that attaching files to an Upload task does not complete your task. Files required for an Upload task must be uploaded by the 'Upload files' button.
Workflow#
The final tab only appears if a task is in a workflow. There are a number of powerful features available in this tab to enable you to track and manage workflows. Please see this help file for a full description.
Table view#
Using the table#
You can change from 'List view' into 'Table view' by clicking on the tab name. Whichever view you are in will be highlighted blue.

There are a variety of features available within the table to help you organise and filter your tasks. Please see this guide for a full description of Exaprojects' table features, such as moving, hiding and resizing columns.
The 'Table view' table differs to most other tables in one key way: its individual column searching. As you can see, instead of having to click the column title to show the search area, the columns that can be filtered have search boxes already present beneath the column title.

By clicking these search fields and typing, you can filter the table.
If you wish to export a spreadsheet of your filtered tasks, simply click the 'Export 'button.

You can easily reset any filters by simply clicking the 'Reset table' button - this will remove all your current filters and reset the table back to its default state.

Good to know
Don't forget a number of the columns are orderable. 'Due date', 'Priority', 'Status', 'Title' & more can be used to order the table by their results. This means, for example, you could quickly see all tasks with a status of 'not started' ordered by their due date. Please see here for more information.
Table actions#
In the 'Title' column you'll notice that the task titles are links. As such, if you click the link you'll be presented with a menu providing you with some further actions, dependent on your permissions.
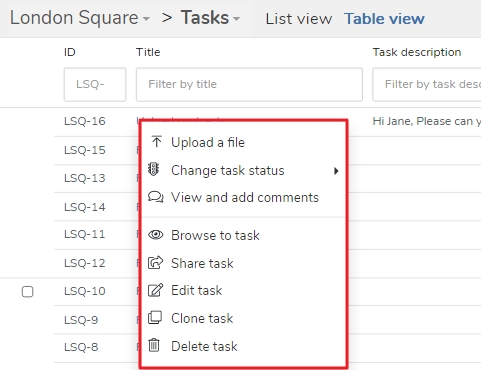
As the above task is an Upload task and we are an assignee, we also have the option to 'Upload file', meaning we can complete this Upload task from the table. Similar actions are available for Decision tasks, Complete & Sign Document tasks and Form tasks. You can also add comments and if the task is in a workflow, view the workflow overview window & more. Note that 'Browse to task' will open the task in the 'List view' tab, useful if you want to see a task in more detail.
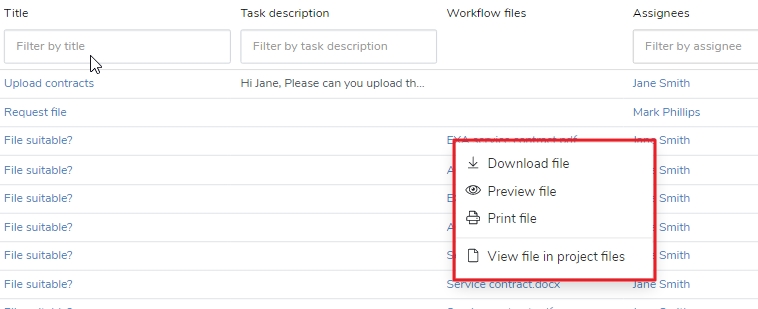
A different menu is available if you click an item in the 'Workflow files' column in which you can view and download the files, amongst other actions.
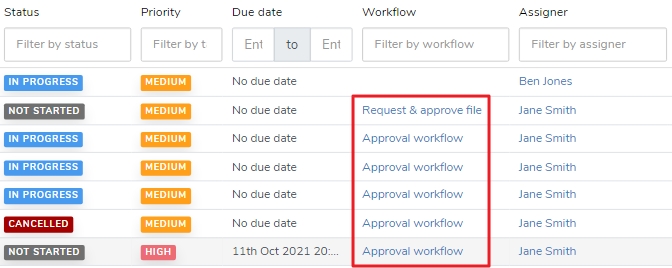
Clicking the workflow name in the 'Workflow' column will automatically open the workflow overview window.
Finally, you may notice some tasks have a checkbox available in the very left most column.

These will only be available for Decision tasks. They are used to multi make decisions for workflow tasks. I.e., if you have 10 Decision tasks assigned to you from the same workflow, you can check the checkbox by each task in the table and then make a decision for all 10 in one go. Please see this help file for more information on multi making decisions.
Good to know
If you have the 'Table view' selected when you leave the Tasks page, Exaprojects will ensure that the 'Table view' is selected by default when you next visit the Tasks page.