Assigning a workflow kick-off rule
In brief
Workflow kick-off rules can be configured on folders in the Project Files page. They allow you to set up a series of conditions and a workflow to be triggered. Any files that are then uploaded to that folder (inclusive of Task and My Available File uploads) will be checked to see if they match the conditions. If they match, they'll be automatically placed in the specified workflow. If they don't, no further action will be taken. Be aware that this only applies to uploads - matching files that are moved into the folder won't be placed in the workflow.
Required permissions
Can assign kick-off rules
Workflow kick-off rules are created and assigned in the Project Files page, so please navigate there first. Once there, find the folder you wish to attach the workflow kick-off rule to and right click it. In the menu, hover over 'Change properties' then in the submenu, click 'Edit workflow kick-off rules'.
In the 'Edit <folder name> workflow kick-off rules' window that then appears, if you have already made a workflow kick-off rule, you can simply search for it in the 'Select rule' search box. Once you've found your desired rule, click it and then click 'Submit'. Your workflow kick-off rule will then be applied.
If there aren't any workflow kick-off rules on your project yet, you'll need to create one.
Good to know
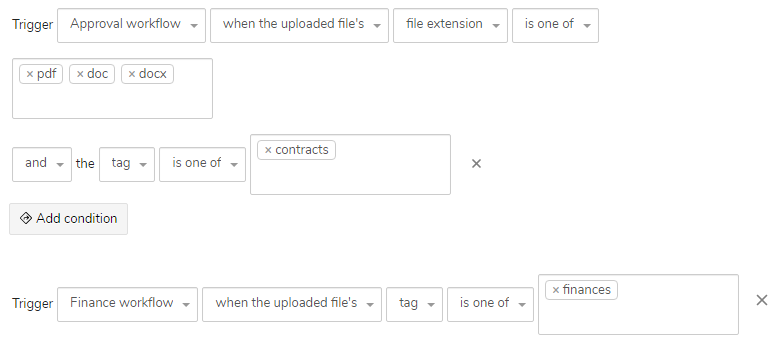
Be aware that files are checked against workflow kick-off rule triggers in the order you build them. In essence, they are first come first serve. For example, if the kick-off rule in the below image was applied to a folder and we uploaded a PDF file that had both a 'contracts' tag and a 'finances' tag, it would be placed in the 'Approval workflow', not the 'Finance workflow', because it matched the 'Approval workflow' conditions first.