Creating a workflow
In brief
Workflows consist of a series of tasks and actions chained together, allowing for complex sequences of events to be completely automated. Workflows are built on workflow templates, which must be created first.
Required permissions
Can create new workflows
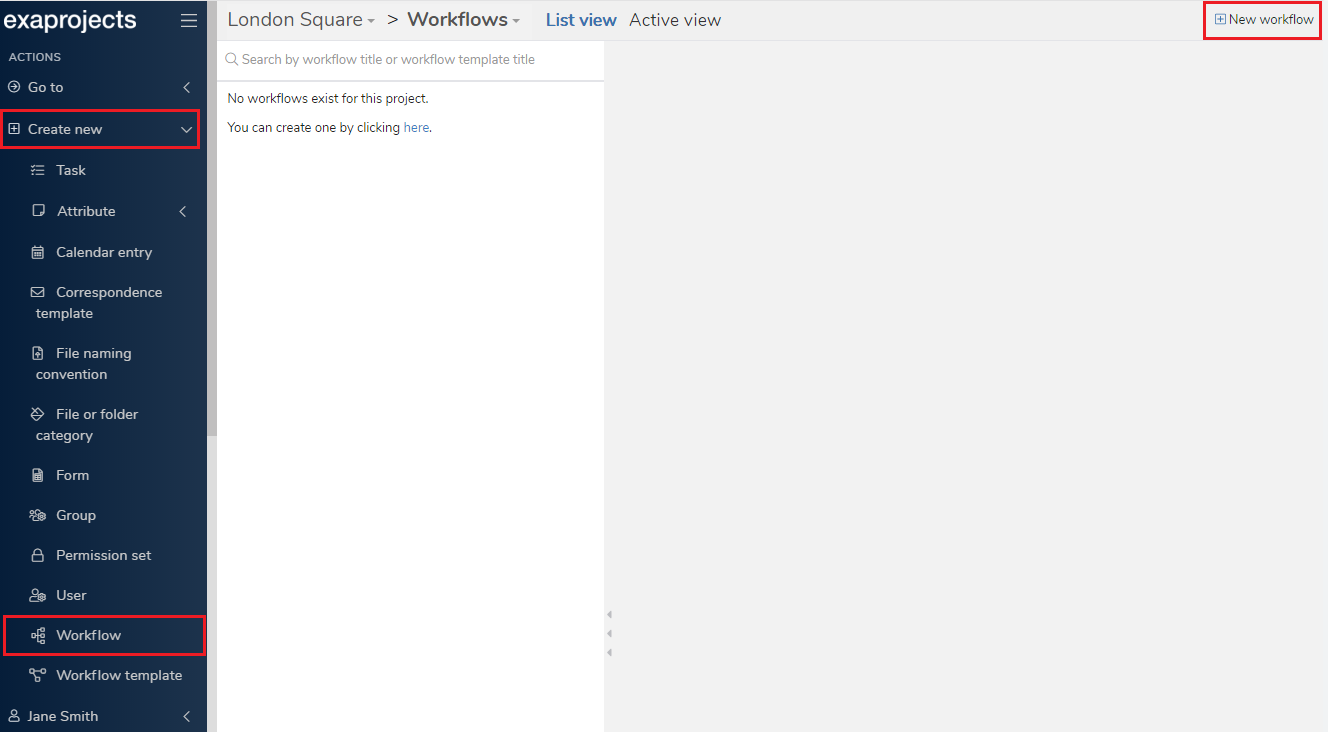
To access the Create Workflow page, either:
- Click the ‘Create new’ button in the left hand side menu
- Click ‘Workflow’
Or:
- Whilst on the Workflows page within your project, click ‘New workflow’.
When the page has loaded, you can choose which workflow template you want to base this workflow on by selecting an option in the 'Workflow template' select box, located in the top panel on the right hand side. In our case, we'll use the 'Request & approve file' template we made in the create workflow template tutorial.
As you can see, the workflow template diagram is loaded into the left hand side and, on the right, we can see the various task and action node titles have been created as tabs. They are coloured red to indicate that they're currently incomplete and further information is required from you.
The first and current tab, 'Details', requires us to give the workflow a title, in the 'Workflow details' section. This will be used to identify and search for the workflow across the site - so make sure it's descriptive! You can also add an optional description to further differentiate between workflows.
A key feature here is the 'Will workflow be used for a kick-off rule?' option. If you intend to attach this workflow to a folder as a kick-off rule, or use it solely when manually adding files to workflows, then select yes here. Essentially, this option means the workflow wont immediately start and progress to the first task - a file will need to be added to it first. In our case, because the first task is an upload task, we do want the workflow to start straight away, so that the 'Request file' task is immediately created. As a result, we'll set this option to no.
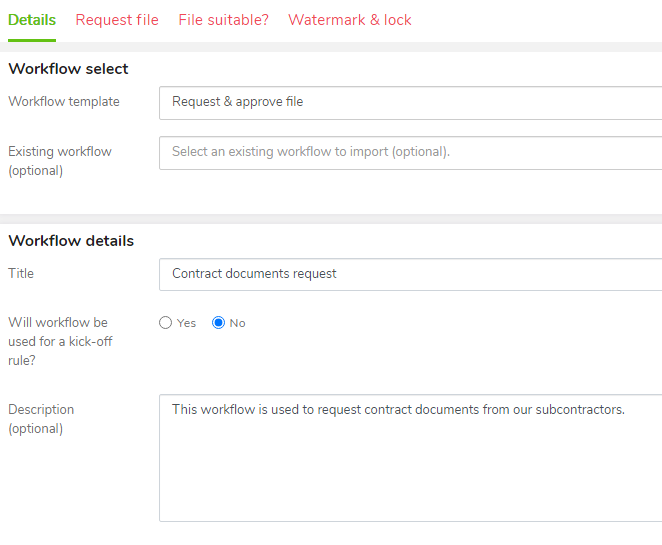
Another feature worth mentioning is the 'Existing workflow' select - if you've made a workflow using the same template previously, you can search for it here. It'll then populate all the fields with what you previously specified in that workflow, saving you time if you're just making a small update.
Once you've completed the required fields in the 'Details' tab, you'll notice the tab colour turns green. This means you've finished with this workflow node and can move onto the next one.
To provide the required information for the 'Request file' node, you can either click the tab, or click on the node in the diagram. Once clicked, you'll notice the red line beneath the tab, and that the node has a turquoise border around it in the diagram. This helps you identify what node is currently selected.
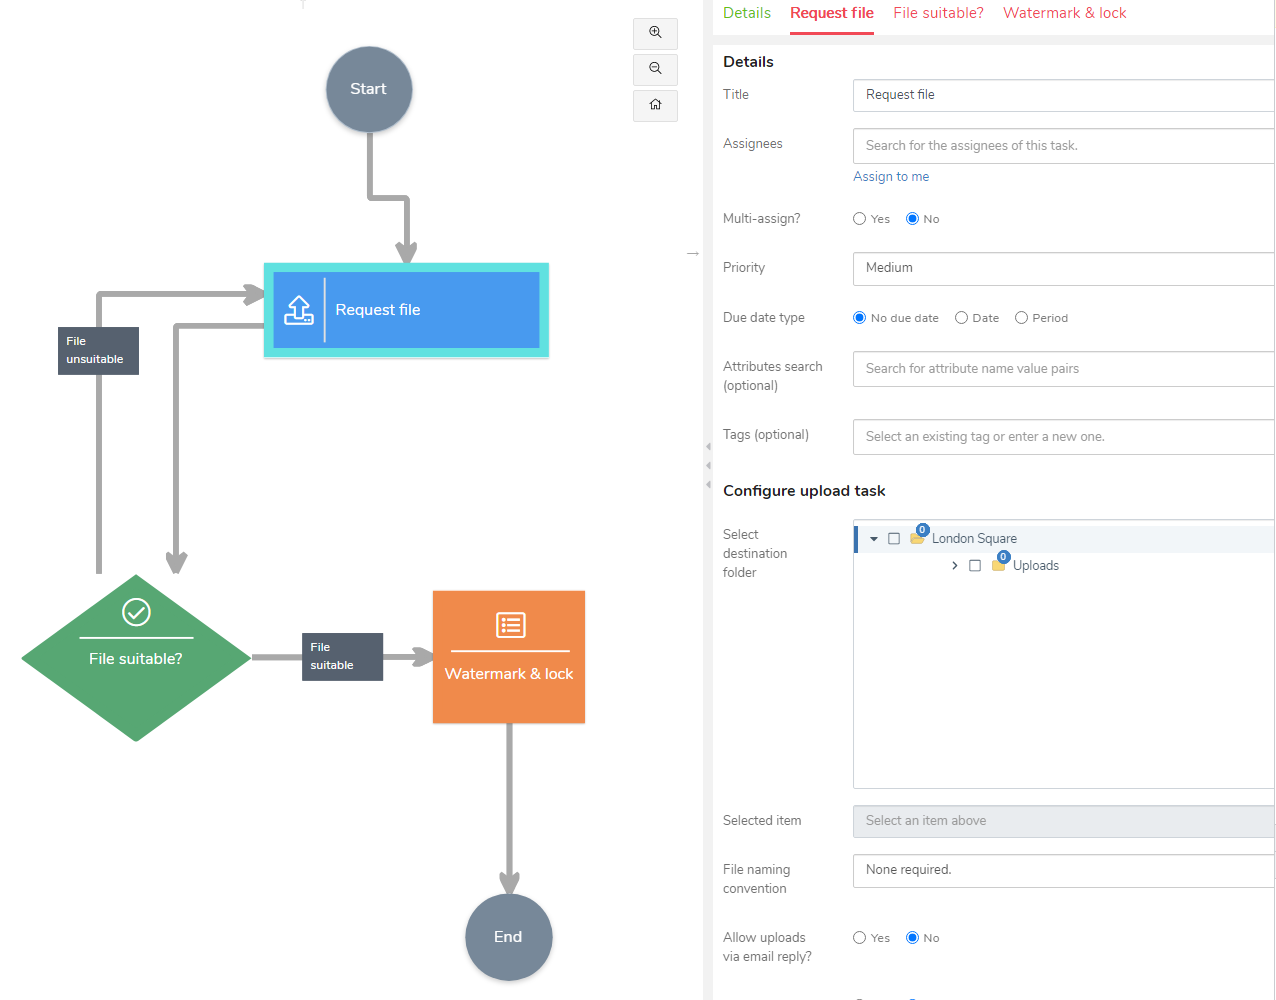
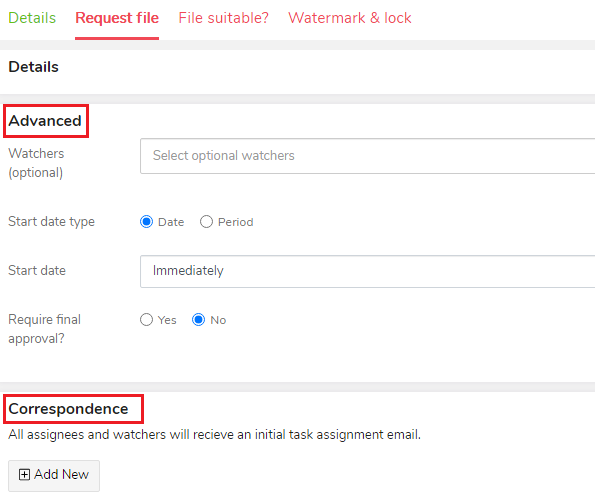
Next, you'll need to fill in the required fields in the 'Request file' tab. Fortunately, this is the exact same process as if you were creating an upload task. At a minimum, you will need to select a destination folder for the uploaded file and select an assignee (or assignees) of the task. To add watchers, or to set up email or text reminders, click on the 'Advanced' and 'Correspondence' sections to expand or contract them.
As 'File suitable?' is a Decision task node, you can complete it using the same steps as creating a decision task. On the other hand, 'Watermark & lock' node is an Action, which are specific to workflows. The purpose of this node is to update file properties as they traverse a workflow. For example, you may want to lock, watermark, or make files available. You can see the possible action types by clicking the action type select box.
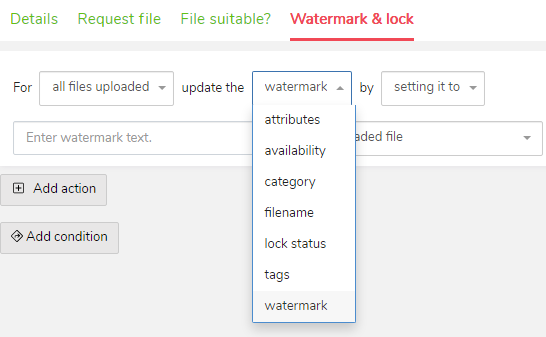
Once you select an action type, the following fields will update accordingly. For example, clicking 'availability' will then allow you to select a user to make the file available to.

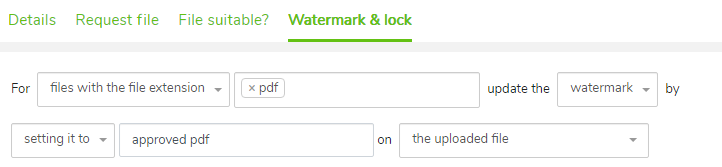
You can also change the action trigger condition by clicking the select box with 'all files uploaded'. The options here grant you fine-grained control over what types of files will have the given action performed on them. As an example, in the below screenshot, only PDF files will be given the watermark 'approved pdf'.
Finally, by using the 'Add action' and 'Add condition' buttons, you can chain multiple action types together.
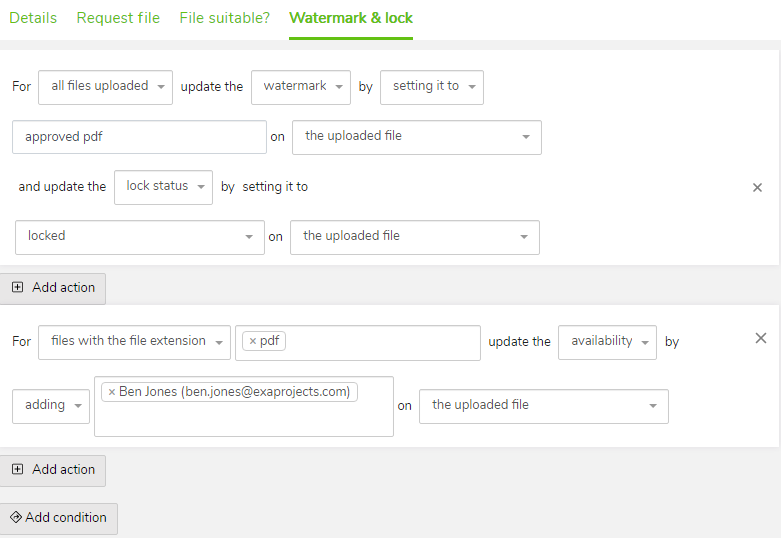
Note that, clicking the 'X' icons by the new condition or action will let you remove them.
Now you've filled in all the tabs, they should all be green. You can then click the 'Create' button in the top right to create your workflow. The tab will remain open after you've created your workflow in case you want to create another workflow. If you don't, click the notification or simply close the tab.
Good to know
Now you've made your workflow, you may want to know how to check its progress.