Creating a workflow kick-off rule
In brief
Workflow kick-off rules can be configured on folders in the Project Files page. Any files that are then uploaded to that folder (inclusive of Task and My Available File uploads) will be checked to see if they match the rule. If they match, they'll be automatically placed in the specified workflow. If they don't, no further action will be taken. Be aware that this only applies to uploads - matching files that are moved into the folder won't be placed in the workflow.
Required permissions
Can create new kick-off rules
Workflow kick-off rules are created and assigned in the Project Files page, so please navigate there first. Once there, find the folder you wish to attach the workflow kick-off rule to and right click it. In the menu, hover over 'Change properties' then in the submenu, click 'Edit workflow kick-off rules'.
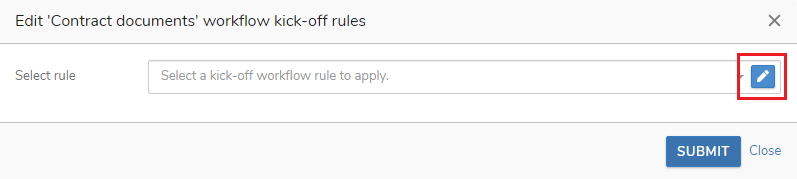
In the 'Edit <folder name> workflow kick-off rules' window that then appears, if you have already made a workflow kick-off rule, you can simply search for it in the 'Select rule' search box. Once you've found your desired rule, click it and then click 'Submit'. Your workflow kick-off rule will then be applied!
If you do need to create a new workflow kick-off rule, however, click the pencil button in the 'Select rule' search box.
This will then open the 'Create or Update Workflow Kick-Off Rules' window in which you can create new workflow kick-off rules, or update existing ones.
To start things off, you first need to give the workflow kick-off rule a title, in the 'Kick-off rule title' field. This will be used to identify your workflow kick-off rule when you later search for it. To assist in differentiating between rules, you can also give it an optional description, in the 'Kick-off rule description' textbox.
Next is the 'Apply to subfolders?' option. If this is set to yes, it will mean that all subfolders of the current folder will inherit this rule. So if someone uploads to a folder which is a child of this folder, that will still trigger the file to be added to the workflow (provided it matches the rule). Generally speaking, you'll want to leave this as 'Yes'.
The final section is where we build our rule. As you can see, you're required to select the desired workflow in the search box after the 'Trigger' text. If you click this box, you can choose a workflow which will be triggered by this rule.
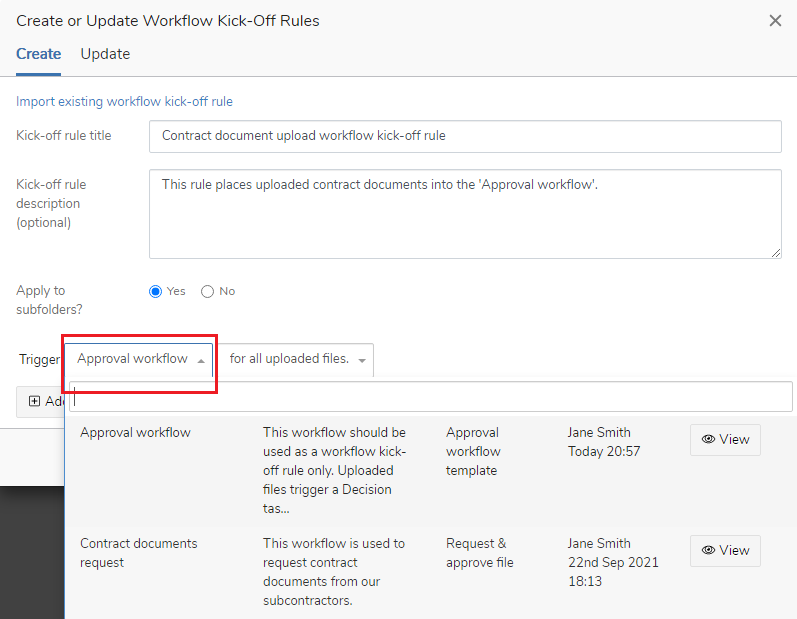
The next search box, 'for all uploaded files', indicates that all files uploaded to this folder will be placed in the workflow you specify ('Approval workflow' in the above example). In most cases, this is the desired behaviour, and so you can now simply click the 'Submit' button.
if you wish to only add certain types of uploaded files to the specified workflow, then you should select the second option in the dropdown. As you can see, this gives you further options with which to build your workflow kick-off rule.
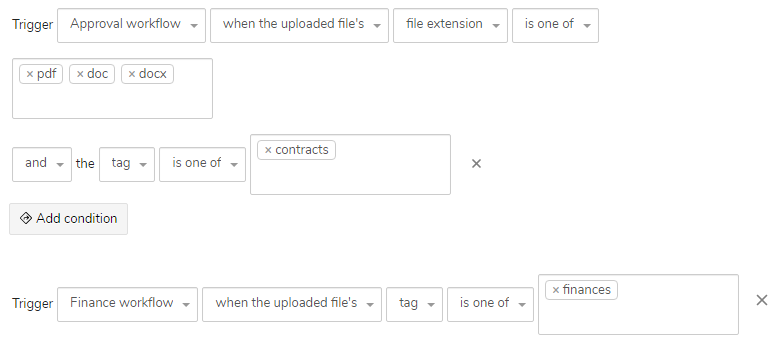
There are number of different rules you can apply. For example, any Word documents that are uploaded can be placed into one workflow, whilst any PDF files are placed into another. Alternatively, any files that are uploaded with the tag 'finances' are placed into a finance workflow, and any files with the tag 'HR' are placed into a HR workflow.
You can also use the 'Add new trigger' button to allow for more than one workflow to be triggered. The 'Add condition' buttons let you add more constraints to the rules - allowing for more fine-grained control over what types of files are placed into workflows.
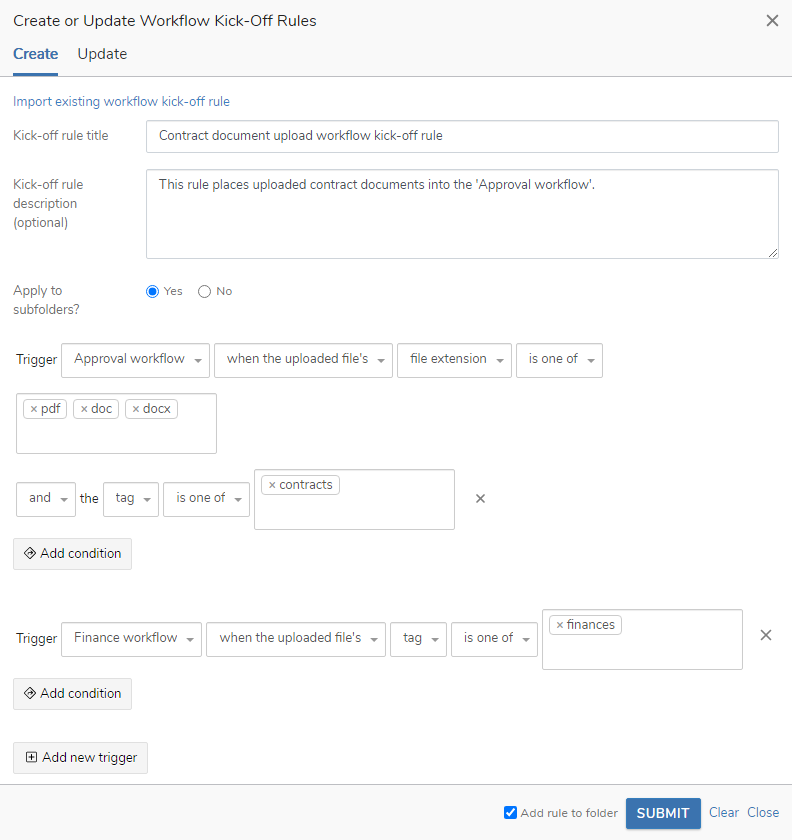
Once you're happy with your rule, you can click the 'Submit' button. You can usually leave 'Add rule to folder' checked - this just means this rule will be pre-populated into the search box in the 'Edit <folder name> workflow kick-off rules' window - saving us a bit of time!
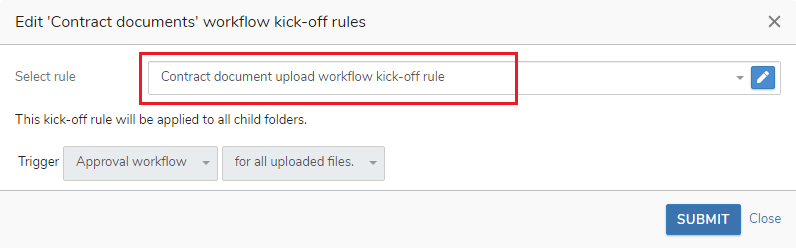
As you can see, the workflow kick-off rule has been pre-selected (as we kept 'Add rule to folder' checked in the previous window). You'll also note there's some read-only information about the rule - whether it applies to child folders and the rule details.
If you're happy with the rule and want to apply it to the folder, hit 'Submit'. You'll then get a confirmation message and you should see the workflow kick-off rule icon appear by the folder name in the file-tree.
![]()
You can also see the workflow kick-off rule and the workflows that could be kicked off by the rule in the 'Info' tab of the folder.
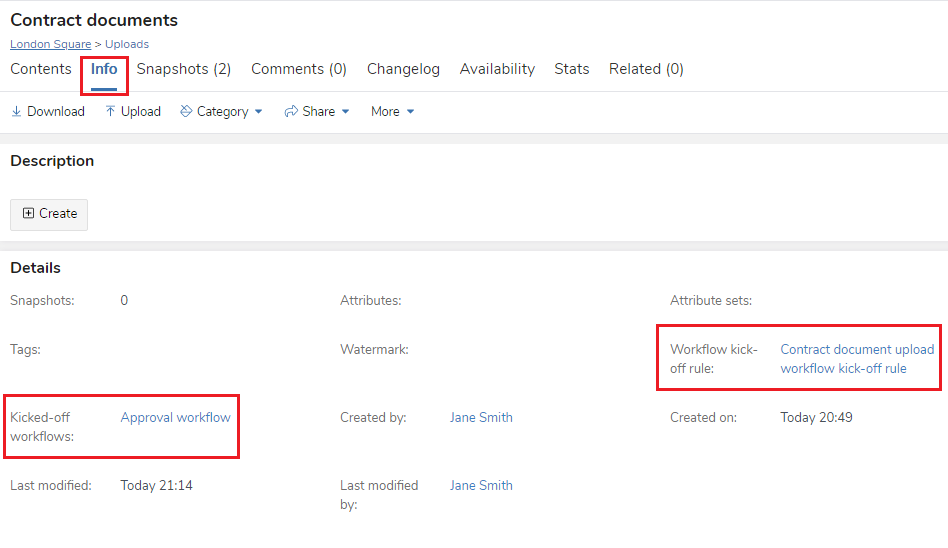
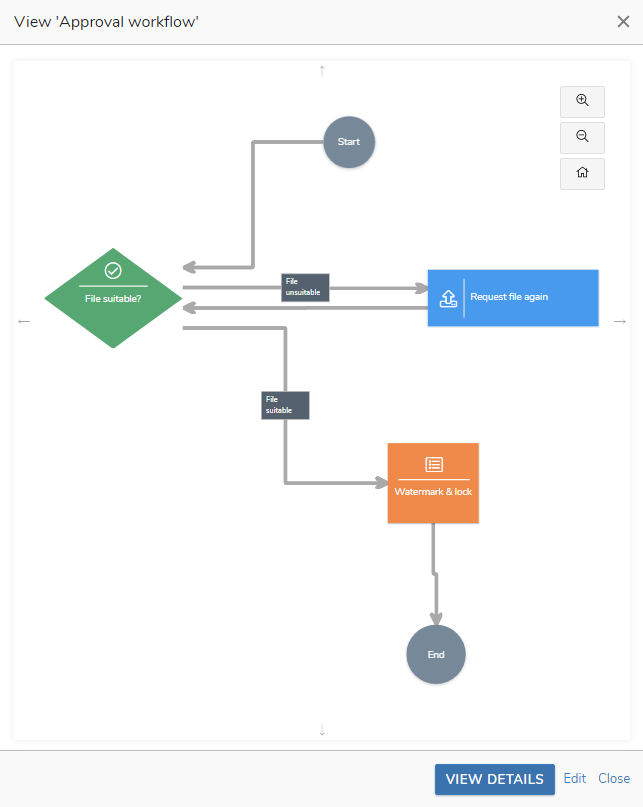
You can click the worklow kick-off rule name to view the rule in the 'Update' tab of the 'Create or Update Workflow Kick-Off Rules' window. On the other hand, clicking the kicked-off workflow name will open a window showing the workflow that will be kicked off.
Good to know
Be aware that files are checked against workflow kick-off rule triggers in the order you build them. In essence, they are first come first serve. For example, if the kick-off rule in the below image was applied to a folder and we uploaded a PDF file that had both a 'contracts' tag and a 'finances' tag, it would be placed in the 'Approval workflow', not the 'Finance workflow', because it matched the 'Approval workflow' conditions first.